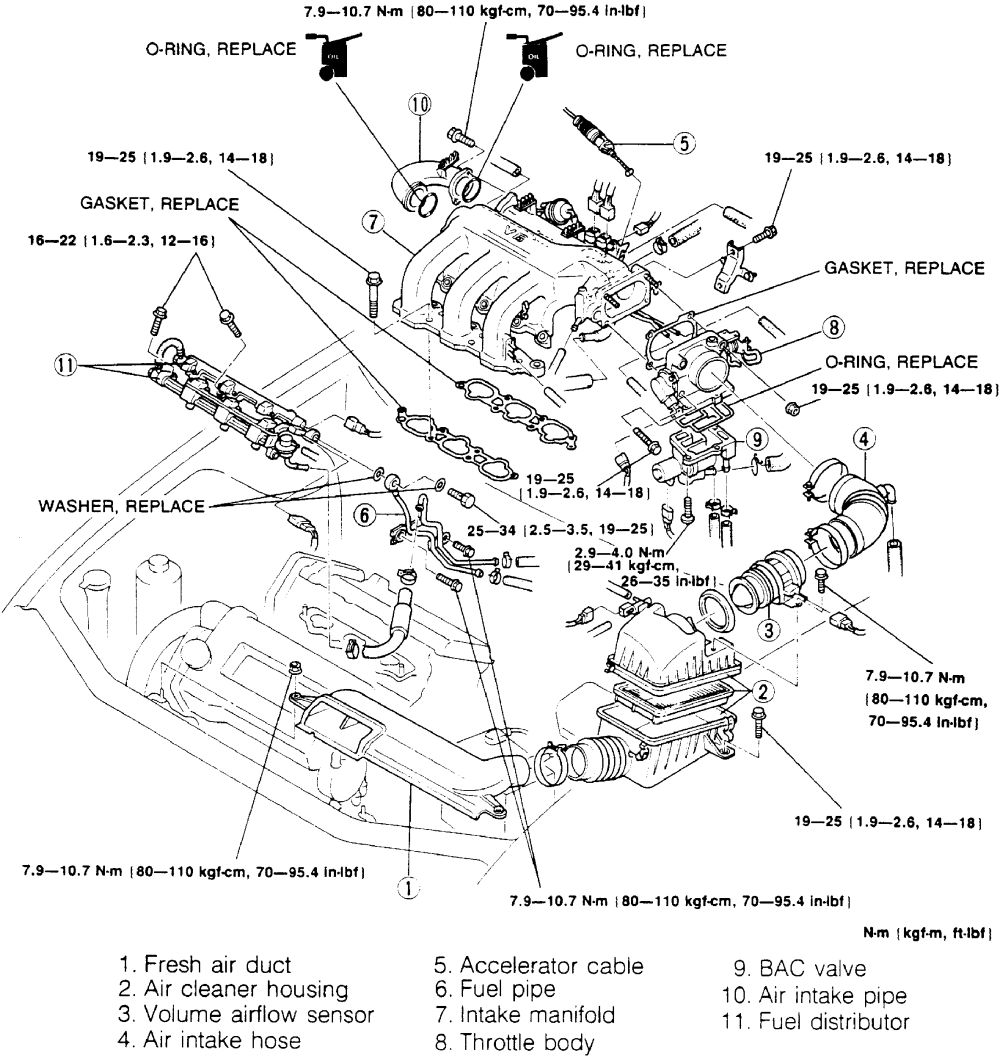
Fig. 15: Exploded view of the intake manifold assembly for the 1.8L and 2.5L engines
See Figure 15
Properly relieve the fuel system pressure.
Disconnect the negative battery cable and drain the cooling system.
On MX-3, remove the upper strut bar.
Fig. 15: Exploded view of the intake manifold assembly for the 1.8L and 2.5L engines
Remove the air cleaner assembly and ducts.
Disconnect the accelerator cable. Label and disconnect the necessary electrical connectors and vacuum hoses.
Disconnect and plug the fuel lines. Disconnect the coolant hose from the air bypass valve.
Remove the intake manifold support bracket. Remove the intake manifold-to-cylinder head bolts and remove the intake manifold.
If necessary, remove the throttle body and air intake pipe from the manifold.
Check the intake manifold for cracks or other damage. Check the surface of the cylinder heads and intake manifold for warpage using a straightedge. Replace the intake manifold, as necessary.
To install:
Clean all gasket mating surfaces.
If removed, install the throttle body using new gaskets. Tighten the nuts/bolts to 19 ft. lbs. (25 Nm).
If removed, apply clean engine oil to new O-rings and install the air intake pipe to the intake manifold. Tighten the bolts to 95 inch lbs. (10.8 Nm). On 1.8L engine, the bolts must be tightened in the proper sequence.
Position new gaskets and install the intake manifold to the cylinder head. Install the mounting bolts and tighten, in 2-3 steps, to 19 ft. lbs. (25 Nm), working from the center toward the ends of the manifold.
Install the intake manifold bracket and tighten the bolts to 19 ft. lbs. (25 Nm).
Connect the coolant hose to the air bypass valve. Connect the fuel lines.
Connect the vacuum hoses and electrical connectors. Connect the accelerator cable.
Install the air cleaner assembly and ducts. On MX-3, install the upper strut bar.
Connect the negative battery cable. Fill and bleed the cooling system.
Start the engine and bring to normal operating temperature. Check for leaks. Check the idle speed.